Best Replacement Battery For Samsung Galaxy J7 Prime
Image

| Battery | Check Current Price |
|---|---|
| SHENMZ Galaxy J7 Prime Replacement Battery - 3600mAh | View On Amazon |
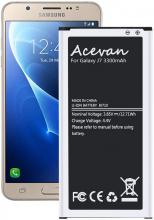
| Acevan Galaxy J7 Prime Battery Replacement - 3300mAh | View On Amazon |
| Amyant Galaxy J7 Prime Replacement Battery - 3500mah | View On Amazon |
Samsung phones are made to last with their durability and sturdy frame as well as advanced technology that ensures longevity. Unfortunately, the same can’t be said for the battery present in the phones. Due to the heavy and constant use, our mobile phones go through on a daily basis, it is impossible to make sure your battery works optimally throughout the phone’s life.
This is when getting a battery replacement can help turn your phone back to its original excellence! Elongate your battery life and maximize your smartphone’s use by replacing it with one that is fully compatible and helps restore your phone’s processes and functions.
What are the best battery replacement options for the Samsung Galaxy J7 Prime?
How to replace your Samsung Galaxy J7 Prime battery?
Products you will need -
plastic triangle opening tool
nylon spudger
SIM card ejection tool
fine tip curved tweezers
precision knife
premium 2-millimeter red adhesive roll
multi-purpose heat gun
professional Phillips screwdriver
playing cards
Step 1 -
Ensuring your phone’s battery level is below 25%, switch it off.
Step 2 -
Remove the SIM card along with the SIM card tray, as well as the MicroSD card and tray from the other side of the phone with the SIM card ejection tool.
Step 3 -
The Samsung Galaxy J7 Prime phone’s 5.5-inch display screen is solidly glued on with a tight fit on the frame. To loosen it up, apply heat to the edges and soften up the adhesive.
Step 4 -
Using the precision knife, make enough space to insert a playing card inside and use the card to slice through the sticky adhesive, carefully decoupling the screen from the phone’s frame.
Step 5 -
Since the display assembly is still connected to the Samsung Galaxy J7 Prime phone, don’t remove it completely. Slowly remove the bracket that covers the display cable and detach it from the motherboard to free the screen.
Step 6 -
Next, peel off the 3 pieces of black tape and then move on to removing the 16 Phillips screws present on the phone.
Step 7 -
The mid-frame of the Samsung Galaxy J7 Prime phone is snugly secured using press-fit notches. Use the triangle opening tool to release the clips and separate them from the back enclosure.
Step 8 -
Next, move the phone's loudspeaker up from its housing and also remove ribbon cables that house the volume button switches on one side and the power button on the other. These are securely nuzzled in the rear case and need to be removed with care.
Step 9 -
Disconnect the 3 cables at the top from the motherboard. Remove the 2 Phillips screws you see and lift out the motherboard from the frame.
Step 10 -
The next item to be removed is the home button and fingerprint scanner that is housed in the mid-frame right next to the battery.
Step 11 -
Still using the tweezers, remove the cable array including the 3.5-millimeter headphone jack, a signal cable as well as the capacitive sensor for the bottom back button.
Step 12 -
We have finally arrived at the main component to be removed and replaced. The Samsung Galaxy J7 Prime battery is stuck in place using a strong adhesive. Using the triangle opening tool, free it from the adhesive and carefully push out the battery from the frame.
Step 13 -
Replace the old battery for the new one and start assembling the phone back in reverse order!
{"preview_thumbnail":"/sites/default/files/styles/video_embed_wysiwyg_preview/public/video_thumbnails/Z-eb4Gxn9hc.jpg?itok=s6VWJJ_U","video_url":"https://www.youtube.com/watch?v=Z-eb4Gxn9hc","settings":{"responsive":1,"width":"854","height":"480","autoplay":0},"settings_summary":["Embedded Video (Responsive)."]}


